You may be confident of your makeup in front of your mirror, but do you look great in the photos too? Your look captured by the camera will depend on different factors like the time when the picture is taken, the brightness or darkness of the area, or whether the picture was taken with the flash on or not, etc.
Does Applying Makeup Make Photos Amazing
If you are looking for an amazing photograph, you need to know how to apply makeup. The lens of a camera sees the objects differently and hence your regular makeup may not be sufficient.
1. First, do the Basic Fix
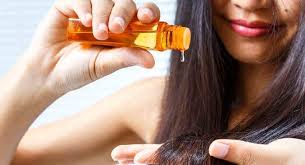
- Use a good moisturizer to prepare the skin for the makeup. It will also make your skin look fresh throughout the day.
- Get the primer you regularly use and apply it with a foundation brush on face and neck. Using the primer helps to reduce the fine lines and other imperfections of the skin. If you do not apply it on your neck, the face and neck will appear in a different color in pictures.
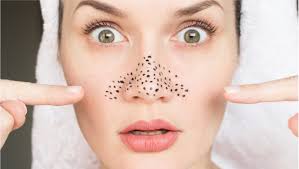
- You can cover the common problem areas of your skin such as under-eye area, blemishes, and spots around nostrils or cheeks, laugh lines, etc. using a well-branded.
- Always apply concealer in very small dots and blend it well with the primer you use. Do not use any sunscreens if you want to avoid washed-out look in photos taken with a flashlight.
- To prevent the whiteness of concealer from overpowering your base makeup, it is better to mix little concealer with a tiny drop of primer before applying it under the eyes.
- If you want to avoid the oily look on your face in the photos you need to give a matte look to the T-zone of your face. Dust some quality translucent powder on the ridge of your nose, space between your brows on the forehead and chin.
- This is a one-time makeup application procedure. Just remember to tap the T-zone areas with a blotting paper before you pose for the photo.
2. Work on Your Eyebrows
- If you want to have a youthful look in photos you need to define your eyebrows using an eyebrow pencil. Make thin hair-like lines using the pencil to make the brow look fuller and fresh.
- Start making strokes from the inner side of the eye and move outwards to create a gradation.
- This will give a natural look to the face in real life and photos. You need to bear in mind that you need to use the eyebrow pencil only after you have done your base makeup.
- Whenever you feel that the color of the brows is going dull, you can re-apply it. Keep a pencil in your purse so that you can use it when needed.
3. Apply Eye Shadow
- You may need to use a neutral shade, darker shade, and the highlighter to make the eyes look larger and well defined. Use a soft eye shadow brush for easy and perfect application.
- Use the neutral shade to give shape to the eye. Apply it with a brush on the lid in an even coat.
- The darker shade is for the crease and the highlighter, when applied to the inner corner of the eyelid and just below the brow bone will brighten the eye contour.
- The eyeshadows need to be used after you have put the makeup and also done your brows.
4. Apply Eyeliner and Mascara to Highlight Eyes
open next page to continue reading….
January 9, 2023
2,001 4 minutes read